mental ray Extensions
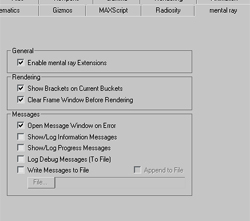
To provide total control over advanced mental ray features, the mental ray Extensions are enabled by default. This adds extra parameters on the Camera, Lights and Materials.
Layers
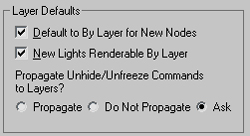
All newly created objects will take advantage of the Layers feature.
Newly created lights will get their Renderable flag set to ByLayer, allowing you to exclude lights from the renderer in a group. Ideal for large projects involving many lights in many places.
Material Editor
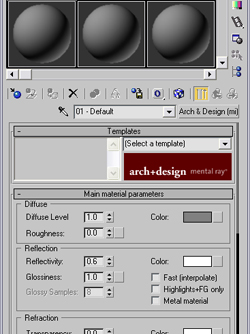
The material editor of 3ds Max will always default to use the new Arch & Design (mi) material, dedicated to acheive photorealistic renderings easily.
The Reflectance / Transmittance information will be shown by default to facilitate the small changes you may need to make for Global Illumination.
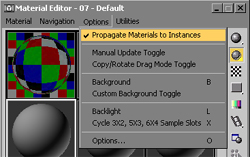
Materials assigned to an instanced object will propagate to every instances of that object automatically.
Mental Ray Connections will be shown by default.
Lights
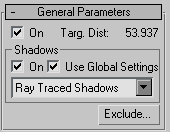
The Lights will default to Cast Shadows and their shadow generator will default to the Ray-traced Shadows (mental ray doesn't support the Advanced Ray-traced Shadows generator)
All created lights will share the same shadows settings as well by using the Global Settings feature.
This will facilitate the management of multiple light sources, allow light going through transparent objects and ensure accurate shadows for linear and area lights rendering.
Daylight
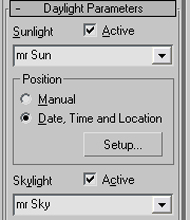
Daylight assemblies will always default to the mrSun and mrSky.
Rendering
The rendering settings for a physically based lighting setup will already be set.
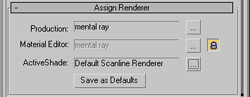
The mental ray renderer will be assigned as default.
Motion Blur
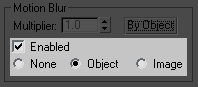
In order to use Motion Blur with mental ray, objects should have Object Motion Blur turned on. Image Motion Blur will not work with mental ray.
Cloning
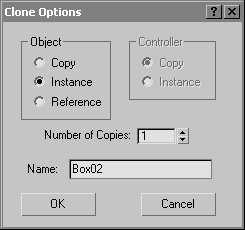
Design and visualization projects typically involve a lot of objects repeated within the same scene. For this reason, the default mode for cloning an object will be Instance.
Select by Name
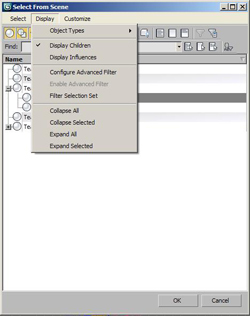
To make the navigation easier with data imported from DWG files (AutoCAD), the Display Children option of the Select by Name dialog is enabled by default.
i-drop
![]()
Downloaded files from i-drop sites will be copied to the /downloads/ folder specified by the path configuration dialog of 3ds Max.
Inverse Kinematics
Manipulating Luminaires built with HD IK chains can sometimes cause "locks" or "jerky" results with with the Max defaults settings.
This is normal in the context of animation: the equation solving is performed between frames and not intended to provide good motion while interactively manipulating a character.
For applications involving Luminaires, we need a high level of interactivity in the viewport and less animation/keyframing support. This setting will make the HDIK solver work better with interactive manipulations.
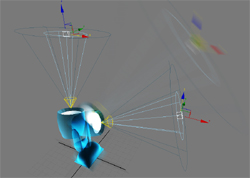
Viewport Shading
![]()
The interactive viewport of 3ds Max is well suited for interactive environments where a few light sources are defined. As a result, the Daylight object and Photometric lights are typically flooding the interactive viewport with bright white color.
To resolve this, it is preferable to set the viewport shading to use what we call Default Lighting as opposed to using the lights from the scene. The Design & Visualization defaults enable that.
Real-World Texture Coordinates
![]()
There are two workflows for texture mapping objects, controlled by the "Use Real-World Texture Coordinates" preference. Design visualization projects typically involve textures on a known size, such as an image of bricks. For this reason the default value of this toggle is ON, which means that objects and modifiers which generate texture coordinates scale them to the real-world size of the object. This also turns on the "Use Real-World Scale" option for 2d texture maps in the material editor, which lets you specify the size of 2d texture maps.