mental ray Extensions
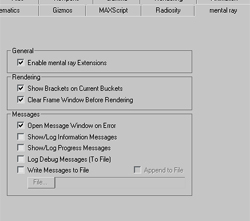
To provide total control over advanced mental ray features, the mental ray Extensions are enabled by default. This adds extra parameters on the Camera, Lights and Materials.
Layers
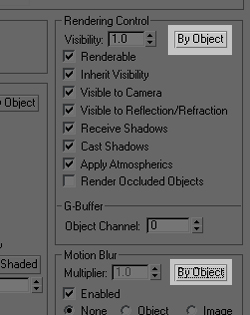
By default, all created objects will remain controllable at the object level. Rendering, Motion Blur and Display properties will be available at an individual level for optimal flexibility. Note that the Layers feature can still be used.
Material Editor
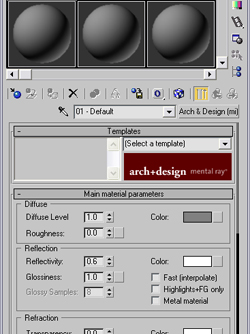
The material editor of 3ds Max will always default to use the new Arch & Design (mi) material, dedicated to acheive photorealistic renderings easily.
The Reflectance / Transmittance information will be shown by default to facilitate the small changes you may need to make for Global Illumination.
Mental ray
Lights
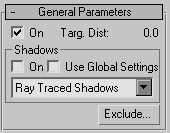
The Lights will default to not cast any shadows. This is to facilitate the process of creating fill lights, highlights and effects that do not require shadows in traditionnal animation scenes. The default shadow generator will be set to Ray-traced Shadows, as they typically render more efficiently than Shadow Maps in mental ray.
Daylight
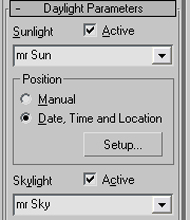
Daylight assemblies will always default to the mr Sun and mr Sky.
Rendering
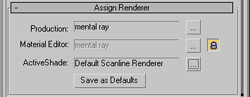
The mental ray renderer will be assigned as default.
No Exposure Control plugin will be assigned.
Motion Blur
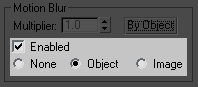
In order to use Motion Blur with mental ray, objects should have Object Motion Blur turned on. Image Motion Blur will not work with mental ray.
Cloning
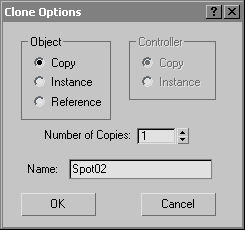
Modeling of characters or animation projects often requires to construct objects based on an existing one. For this reason, the default mode for cloning an object will be Copy..
i-drop
![]()
Studios who use assets published as i-drop content on internal websites do not need textures downloaded to every /downloads/ folder of their 3ds Max installs. For this reason, with the Max default settings, this is turned off (as opposed to the Design & Visualization defaults).
Inverse Kinematics
The solver of the HD IK chains will be set to calculate interpolation between keyframes. This setting is optimized for animation.
Viewport Shading
The interactive viewport of 3ds Max is well suited for interactive environments where a few light sources are defined and interacts in real time with the scene.
Real-World Texture Coordinates
There are two workflows for texture mapping objects, controlled by the "Use Real-World Texture Coordinates" preference. Modeling and animation projects typically involve free-form textures to be placed on objects for maximum visual effect. For this reason the default value of this toggle is OFF, which means that objects and modifiers which generate texture coordinates don't scale them to the real-world size of the object. This is the style of texturing which 3ds Max has traditionally supported.